Thursday, March 14, 2013

Paint Storage – Part Two


Yesterday, I left off with cutting way down on my paint inventory and the task of determining new storage for what paint remained.

Lucky for me, I found this great post over at http://iheartorganizing.blogspot.com and I couldn’t wait to get started! 

I downloaded (for free I might add) her printable Paint Project Color Reference chart that I used to list all the paint colors I'm keeping.  This will work as a great cross referencing tool! 


I knew I had several gallon cans that would have to stay as is and I would continue to store them in the garage (just a lot less of them).  For the smaller cans, and those with little paint left in them, I wanted to do something different. 

So, once again, thanks to Pinterest and Jen at iheartorganizing, the answer was already there for me.  Mason jars!!!


Now I just needed labels!  Bummer for me that I don’t own a Silhouette Cameo machine to make colorful labels like hers to go on top of the jars!

So, I had to get a little creative.  My first thought was that I wanted something fancier than a plain circle to make my labels, so I quickly jumped in my car and ran to Jo-Ann’s.  I purchased this large punch for $17.99 (yikes), but justifying it (kinda), I bought it anyway. 


As I was heading home, it hit me!  Avery labels!  I u-turned and headed to Office Depot and there they were – just waiting for me to take them home.  Oh yeah, the good news – with my Office Rewards card I got them for $10.49!  Woo hoo!!! 


Of course, they were plain round, but by adding a template they took on a totally different look.

I could not get over how simple they were to make!  I went to avery.com/print and the rest is self-explanatory!


All that was left was the pouring and disposing of the empty cans!  Since I was by myself for this part, I don’t have any pictures to share, but let me just tell you – I was enjoying every little minute of it!

And why wouldn’t I? 


I could not wait until I had finished all of my jars, to snap a photo!


All of the colors are easy to see and as Jen said,  easy to keep clean!

As for the large punch, that will be going back to the store today!
 
Hope everyone is having a great day and working hard to get their garages in order!

Wednesday, March 13, 2013

Paint Storage – Part One


One of the many items that I have to purge through before I can complete MY garage makeover is P A I N T ,  lots and lots of P A I N T


Several of the paint cans that I have stored in the garage are old paint colors, no longer being used in our home or they are too old to use.  So, why hold on to them right?


Disposing of paint is not as easy as just throwing it in a garbage can and putting out for pickup.  I researched a couple of websites and learned that at least in the state of Louisiana, there are some guidelines.

To sum it up:

1.      The best way to dispose of paint is to use it all, of course, not mandatory (haha).

2.      If you can’t use it all, they suggest that you pass it on to someone who could use it!  Really?  I can’t ever recall picking a color of paint that I knew just the right person that would want my leftovers!!  Pardon the sarcasim, but really?

3.      If the can of paint is more than ¼ full, you should take it to a household hazardous waste location.  Baton Rouge’s Spring 2013 collection will be Saturday, June 1 at Memorial Stadium.  You can research online for your particular area, if you have such a requirement.

4.      Hardened/dried-out paint can be disposed of in a landfill. Leftover latex paint can be dried by removing the lid and allowing the paint to air dry. Be certain that the drying occurs in a location protected from children and pets.

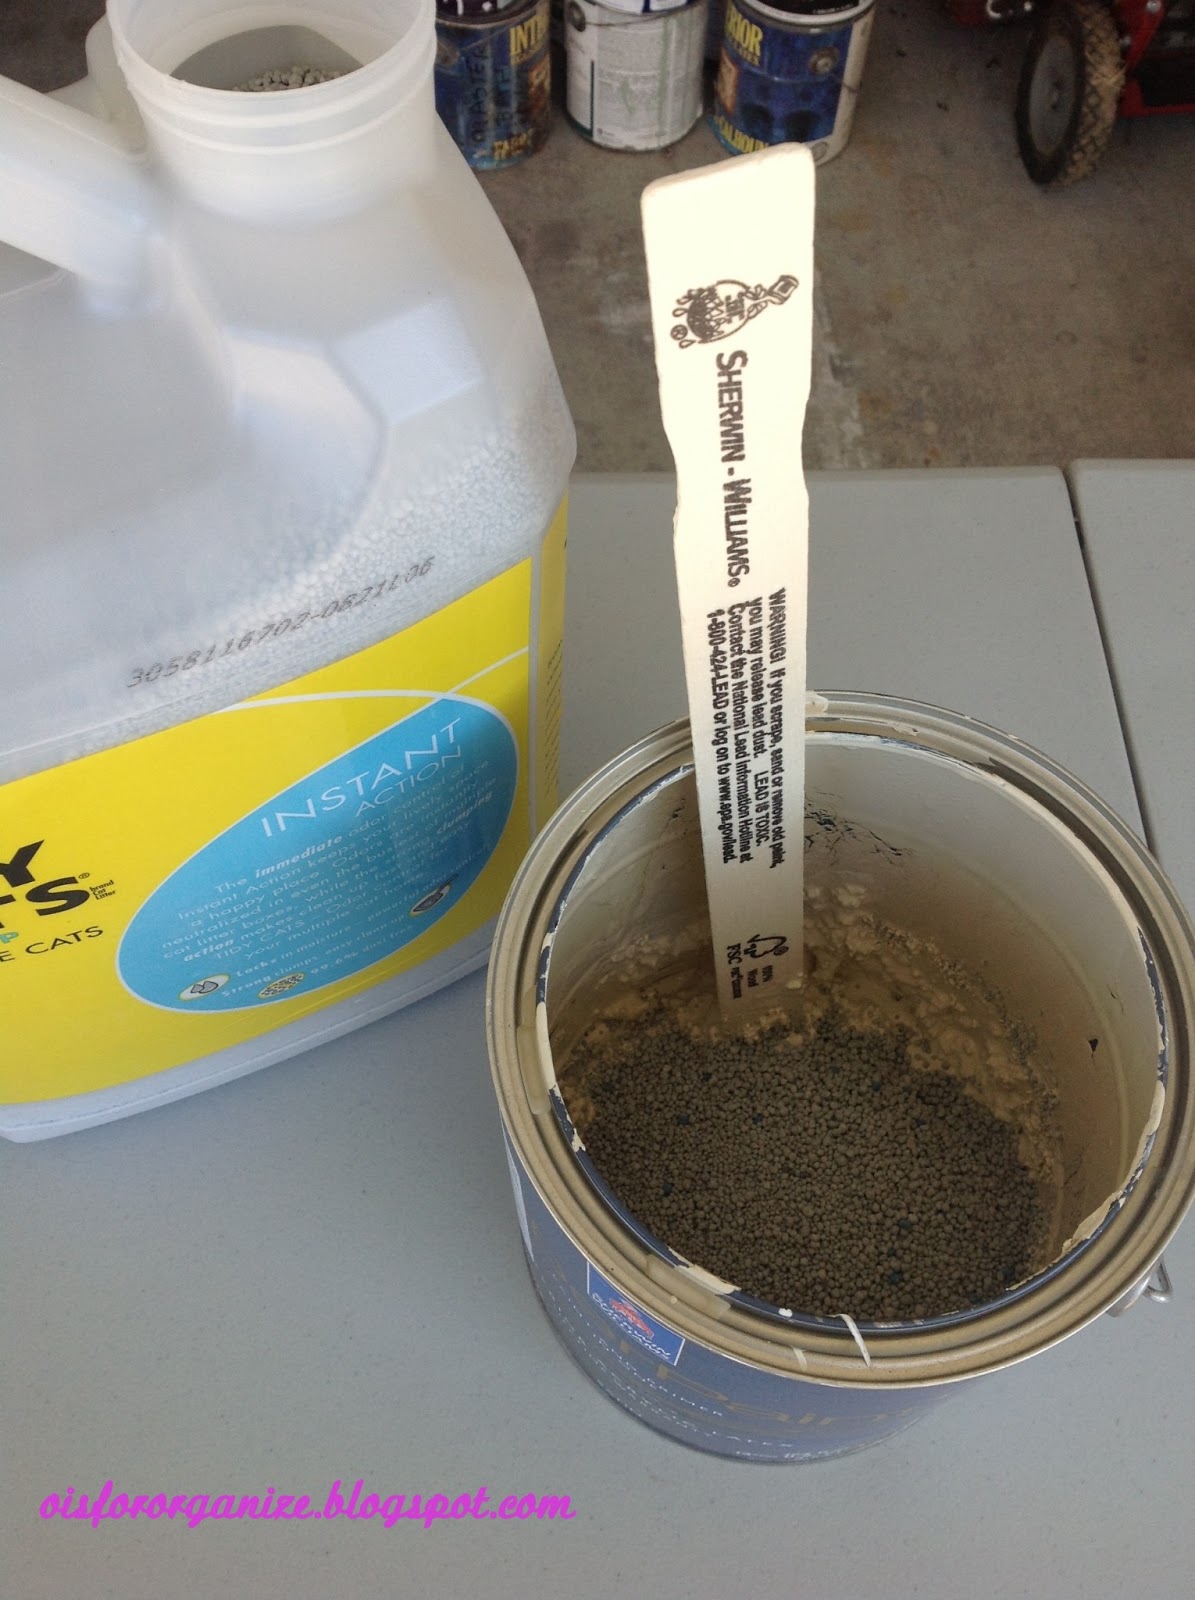
5.      If the can is less than ¼ full, you can mix it with an absorbent (i.e. kitty litter or dirt) and dispose of in a landfill.

6.     Empty paint cans and those containing dried paint can be safely disposed with municipal trash.

So, my process began…

Here’s some “uh oh” wrong colors of paint drying out….


Off to Wal-Mart I ran to get kitty litter and this part was lots of fun….


Now that I’ve cut my inventory in half my next project will be determining how to store the remaining colors for touch-ups, etc.


…stayed tuned for Part 2 of Paint Storage

How is your garage challenge going?  Please share your comments here.

Have a great day!

Tuesday, March 12, 2013

Online Organizer

Are you one of those people that writes usernames and passwords on little tiny pieces of paper and then can’t find them when you need them?  Or, you may keep them in your mobile device and hope that you don’t lose the device or it dies on you forever.  Of course, if you have run all of the regular “back ups” you should be fine, right?
When I was reorganizing my filing system to Freedom Filer (which I love love love), I realized that most of my user names and passwords were written in the left side of my file folders for each account.  With Freedom Filer, I wasn’t going to be using those types of folders any longer and found myself wondering where was I going to keep track of all of that information.
Lucky for me, I have a sister who is probably more organized than I am (although we run a close race) and when I mentioned my dilemma to her, she immediately had a solution.
Online Organizer

Not only did she have a solution, but she actually had an extra Gooseberry Patch organizer for me.   I’m pretty sure that we got off the phone and she went straight to the post office because within a couple of days my organizer arrived!
Online Organizer
The organizer is divided by alphabet and each page gives you the ability to write three entries.
Online Organizer
I  really like that it gives you the option to write notes because many times, you are required to answer security questions as well as usernames and passwords, and this gives you a place for those questions and answers.
Online Organizer
My sister, Pege found ours at a local shop in Ft. Lauderdale, Florida, called “Cross Stitch Cupboard” www.crossstitchcupboard.com or you can visit www.gooseberrypatch.com , and they offer it for $7.95 and in three other patterns.
Online Organizer

What do you use to keep track of your online account info??  How is it working for you?  Please email us at www.oisfororganize@gmail.com
Hope everyone is having a great day and thanks for stopping by!

Friday, March 8, 2013

Springtime Around the Table

It may not feel like Spring is just around the corner outside, but it doesn’t mean we can’t bring it inside. I love decorating my house for Spring and thought I’d share my tablescape with you and maybe it would send a bit of sunshine your way!

Decor


It doesn’t really have anything to do with being organized but sometimes, we just need to take a break and decorate, right?
Decor


I splurged a couple of years ago and purchase these Vietri blue plates and wanted to incorporate them into the table setting. (Kind of a mental thing I guess – the more I use them, the more I feel okay about my splurge!) The smaller bunny plates I found at TJ Maxx two years ago and I loved the pink butterfly about to rest on Mr. Bunny’s nose!

I’m really enjoying different textures these days, as you can see in my centerpiece. The burlap in the center bowl was recycled again from my WASH project and I added some plastic eggs that pull the blues together with the plates.
Decor
The candlestick holders are a handmade gift from my father many years ago and I always love when I can use them on the table.
Decor

And, of course, the table would not be complete without a couple of friends to remind us of the season.
Decor

Decor

Now I just need to spread some more sunshine throughout the rest of the house and on the back porch!

Hope everyone has a wonderful weekend!

Kim

Tuesday, March 5, 2013

DIY Chevron Pattern Tutorial


Today’s post is another feature from my daughter, Kelly. I’m sure everyone has noticed the popular chevron print appearing on everything from pillows to rugs to even peg boards! My daughter recently painted the pattern onto some shelves she’s had since her childhood.

She was using the shelves in her office, but decided to paint and modernize them so that she could incorporate the unit into her guest bedroom. The shelves came out so nice, I asked her to give a tutorial on how to paint a chevron pattern.

 Chevron Tutorial:

The first thing I did was give the shelves a fresh coat of white paint. While the paint was drying, I began thinking about the dimensions for the chevron print.  I really wanted the design to be proportional to the unit (not too big or too small), so that looking at it head on you could easily see there was a chevron print across the back. I ended up going with a height of 5.5 inches (the width was already predetermined by the width of my shelves).

[Measuring tip: I took the height of the shelves and kept dividing it by different numbers until I got a measurement that would divide as close to a round number as possible. I did this because I didn’t want there to be half of a zigzag across the top of the unit – I wanted to try and have a full zigzag across the bottom and a full one across the top.]

Once the paint dried, I got the level, the ruler, and the tape measure so I could get started on drawing my design. (Unfortunately the shelves could not be taken out, which made things a lot more complicated, but I’ll show you how I worked around that.) To begin creating the pattern I made horizontal lines across the back of the shelves every 5.5 inches. Starting with the bottom, I made a pencil mark every 5.5 inches up the shelves.
I used a laser level from my markings, which gave me a nice straight line across the shelves, and used a pencil to draw the line across.

[Measuring tip: Before I started painting I wanted to double check my measurements so I measured in between each horizontal line to make sure they were all 5.5 inches apart. 
Now, I know originally I said that the width was predetermined by the width of my shelves. However, you still have to determine how far apart you want the pattern to “peak”. By that I mean, the chevron pattern is zigzag, so it goes up and down. You have to determine how far apart you want the “ups” to be from one another. I went with 6 inches. So, going across the horizontal line, I made little ‘x’ marks every three inches. (It’s important that you do half (3 inches) of what you want (6 inches) – you’ll see why later).
Bookshelf

Bookshelf

 The next step is to connect the dots! Having a straight edge is SO IMPORTANT here, because this is what will give you the chevron pattern. I used a ruler (again, starting with the bottom) and lined up two diagonal dots and drew a line. You are basically connecting a “peak” with a “pit”. I know that may sound weird – but the point is to create that zigzag pattern. I repeated this step until my entire shelves were complete. (This part would have been a lot easier if I could have taken the shelves out, however I just worked around them. It was important to be able to take a step back and feel like if the shelves weren’t there it would all connect. )
Bookshelf

Painting the pattern! I was so excited to see the pattern in pencil that I could not wait to get to painting. I consider myself to be a decent painter when it comes to trim work, but after all this hard work I knew I had to take the time to put up painter’s tape. This was certainly time consuming, but it really helped to keep my lines nice and crisp. I had some leftover paint from the wall color of the room the shelf unit was going in, so I used that for the pattern and painted every-other zigzag section. (I recommend penciling into each section which color it is supposed to be, because it can start to get a little confusing.)
Bookshelf


bookshelf

I definitely still had to go back and do touch-ups with the white paint, but I know I would have never achieved those crisp lines without the painters tape.

For the most exciting step of all….time to take off the tape and see the final product!!
Bookshelf

I did have to go back with the pencil and erase some pencil marks that were still showing in the white sections where I didn’t paint. If you’re using two different colors, then obviously this wouldn’t be a problem for you. I just went back with the pencil and erased the markings, but I could have taken extra white paint and covered up the spots as well. Honestly, I was too worried about getting white paint on the gray sections to attempt doing that.

I didn’t mention in the steps, but this process took me an entire weekend. There were many points where I had to walk away or take a break because working in between the shelves was tricky! The chevron pattern was just not as easy to paint as I thought it would be, but I’m so glad I stuck with it. It was definitely worth it in the end!

Thanks Kelly for sharing!  Little did I know some 20+ years ago when your Dad and I purchased this unfinished piece of furniture, that you would be turning it into something beautiful and trendy!  

Has anyone else done a Chevron pattern DIY project lately?  Please send me your photos and comments about your project to oisfororganize@gmail.com.

Happy Organizing!

Kim

Monday, March 4, 2013

March Makeover Challenge

Now that our laundry rooms are complete, it's time to move outside! With the weather (HOPEFULLY) starting to get much nicer, I thought it would be a great time to clean up our garages/car ports/storage sheds.

If you fall into the category of wanting to really get your hands dirty and give your garage a complete overhaul, then this plan is for you:

OVERHAUL

Have plenty of storing containers for "KEEP/TOSS/DONATE". Purchase containers/bins or clean the ones you already have for the things that you know you are keeping that will be going back into the garage. Make notes of your items to give you an idea of what type of containers/bins you will need. Place the containers on the driveway or outside of the garage so they are ready for the next step.

Begin the task of going through everything in the garage and assign it to one of the above three categories, and place it in the designated, cooresponding pin. Before things go back inside, clean everything. I know this part will be tedious, but it will be so worth it in the end.

At this point, the garage should be empty and now you will want to give the inside a good cleaning. You can rent pressure washers from the hardware store if you really want to see it sparkle. You may have to call a little in advance to make sure there is one available when you need it.

Place labels on your bins and place them on shelving units or whatever type of storage you have available.

Utilize wall space by installing hooks for bikes, lawn chairs, and lawn equipment. This will keep items in a specific space and off the ground.

Make yourself an iced tea and grab one of those clean lawn chairs and sit back and marvel at all of your hard work!


Now, some of you may decide that is way more than you want or can take on this month. If you fall into this category, you can do more of a "tidying up". Here's a plan for you:

TIDY UPPER

Remove any trash that has collected, things like old cardboard boxes, piles of newspaper, etc.

Give your garage a quick "glance over" and drop off a box of DONATION items.

Put things back in their designated areas that have been taken out.

Sweep the area.

THE LUCKY ONE

If you fall into the category of NO GARAGE/STORAGE SHED/CARPORT, you might want to take the month off or use this month to give your car a good cleaning!

I will be falling under category one! So, just know you aren't alone! Take lots of before and after pictures and PLEASE PLEASE PLEASE email them to us at oisfororganize@gmail .com.

As always, I like to include pictures of inspiration and I know for me, I'm going to need lots of that for this challenge!
Happy Organizing...and don't forget the pics!!


Friday, March 1, 2013

February Readers' Features and the next Monthly Challenge


Today’s post features a couple spaces from readers that participated in my February Laundry Room Challenge.

I was so excited to receive these features yesterday afternoon; I could hardly wait to share them with all of you.

Here’s the first one:

It looks like she had some good ideas before the challenge and I think you will be able to see how she really took those ideas to the next level. Here are her before pictures...


And here are her afters...


Why I like it:

  • The clutter is cleared!
  • Using decorative hook racks for items like her vacuum attachments and other things is not only effective, but also unique!
  • Her colors are all cohesive and the fresh coat of paint on the walls really shows off the room!
  • I love her daughter’s backpack hanging on a hook, which keeps it off the floor and from getting dirty.
  • By adding baskets to the top of the dryer, she’s keeping things in order and accessible.
  • And my favorite addition to the room, the colorful rug!

I bet walking into her laundry room puts on a smile on her face!

Now from another reader:

 This reader shared with me that she was on a tight budget for a laundry room makeover (under $100), but wanted to make some changes to the room because it was not functioning as well as it could be.  I think you will agree that the changes have made a great improvement to the space.


By adding an inexpensive pegboard she was able to get things off of the floor and onto an organized wall!


I love that she added these great baskets on her shelf that keeps things hidden and in order.  She incorporated an inexpensive curtain and then added some DIY ribbons – what a great idea!


By adding the tray on top of her dryer she is able to easily access the dryer sheets and a place to drop the pocket change.

Challenge

The additions of the rug and wall décor (which she found from our previous blog) finish the room off nicely.

challenge

Thanks so much ladies for sharing your makeovers with the O is for Organize community!

So, now that February is behind us, are you ready for the March Madness of organizing?
Seems like an appropriate time to get our GARAGES/CARPORTS/STORAGE SHEDS cleaned up for the summer!  This might be a challenge that you can recruit the help of hubbies, boyfriends, kids, neighbors (just kidding) - you get the idea!
I hope I have gotten your juices flowing for March’s challenge!  Stay tuned next week for some ideas and tips on getting your space organized.
Have a great weekend!

Kim