Showing posts with label Annie Sloan Paint. Show all posts

Monday, August 12, 2013

Keeping it in the Family

My daughter, Kelly and her husband, Brad celebrated their second wedding anniversary this past July and my hubby and I took them out to dinner this past Saturday night to celebrate.


We had a wonderful evening together and a great dinner at a local restaurant in Metairie called "Cafe B".  If you are in the neighborhood, I highly recommend their BBQ oyster appetizer.  They are also served at their sister restaurant, Red Fish Grill in New Orleans. 

(Here is where the photo of the oysters would have gone if they hadn't gotten gobbled up so quickly!)

Kelly and I planned ahead of time that while I was in town we would makeover a piece of furniture that had been handed down to her and Brad from his mother and father.  She was so excited to receive the piece because she was already looking for something similar.  Getting a piece like she wanted and one that was already in the family made it that much better!

Our latest victim of Annie Sloan Chalk Paint!


top half only

The week before I got there, she spent time in the evening after getting off of work, painting it in Old White so that when I got there, all that was left was the waxing! (That's all...haha)


She was so excited to get started that she didn't remember to take a before picture of the whole piece so you will have to use your imagination on what the bottom half looked like before!


Here'a a look at the top half Before & After being painted!

annie sloan


Her husband suggested adding a color to the inside back panel and she chose Coco.  They were both really pleased with how it turned out.


This piece was by far, the largest Annie Sloan project that she and I have undertaken but knew that it was going to be a great piece once it was complete.


I have to apologize for the quality of the pictures.  The weather is soooo hot here that when I left my camera out in the trunk of the car, it fried my memory card and I didn't have another card with me! 

I can't wait to see what she is going to put inside!  I'm sure she has lots of great ideas and once it's filled with pretties I will take some pictures with my camera and share with you.  I'm thinking it won't be long before it's picture perfect ready!

Have a great day!

Kim


Wednesday, April 10, 2013

A Gift that Keeps on Giving


This past Christmas, my daughter, Katie pleasantly surprised me with this interesting table.


Why interesting, you ask -  (assuming, of course, that you are asking).

Let’s start with where she found it.  Katie has a friend who was renting an old house in Baton Rouge and there was some furniture that was left behind in the house.  That make's for some mystery as to the origin of this table which, for me, is very interesting.

Her friend was moving out of state and didn’t want to take the table with her and Katie just knew I had to have it!!

However, the table came with a disclaimer.  Katie wanted me to know that the table was in need of repair and that she wanted to be a part of refurbishing it!

I was skeptical about changing anything about the table because it was just so unique.  However, I knew that she really wanted to do this with me and I will never shy away from time I can spend with my children.  You empty nesters out there can relate!

About a month ago, she and I discussed planning a day to work on the table. Not putting two and two together, we scheduled it for April 4th (the one year anniversary of Mom’s passing).

I woke up that morning, feeling sad and missing Mom.  Wondering, why did I say this day to work on the table?  Shouldn’t I be spending it doing things that would remind me of Mom?  I didn’t really know how this day was going to turn out, but I have to admit I wasn’t very optimistic!

And then Katie showed up and it was as if my mom had tapped me on the shoulder or nudged me in the heart and said, “Spend this day with your daughter and enjoy every minute of every second you have with her today.”

So, after a trip to a local decor shop to pick out the paint colors and a great lunch (very "undiet" like) we headed home and got started.


 How about that for color?


We started out painting the table Barcelona Orange.  WOW!!! I wasn't too concerned because I knew I had the blue that I would be covering the table with later.


After the blue paint dried, we randomly sanded to distress the table and bring out some of the orange (a little bit) and the natural wood.


This picture was taken after we finished waxing one drawer with the clear wax.  You can see how much it really changes the color.


It was one of the best days I’ve had with Katie in a long time.  Now when I look at the table, which sits in my keeping room and kitchen area, so I see it a lot, I think about that day and I am so glad it happened just like it was suppose to!

Thanks Katie, for a gift that keeps on giving!


Thursday, March 21, 2013

Annie Sloan Strikes Again


On a recent shopping excursion with two sisters a couple of weeks ago, I came across a sample size of Annie Sloan Coco chalk paint and fell in love with the color.  Not knowing what I was going to use it on, I bought it anyway and knew it would be put to good use one day!

Coco
source


While I was taking a short break from the garage and suppose to be relaxing for a minute, I couldn’t help but zone in on a small table in my dining room.


You may have noticed this table before in a previous post here.  The size of the table is perfect for this small wall but the color has always bothered me. 

That was when my relax time shifted from the sofa to the table.  Annie Sloan painting is so easy and quick that, to me I justify it as relaxing!!  Why do I play such head games with myself!

The first thing I did was wipe the table down just to make sure there was no dust on the table. 

Then I put the first coat on the table and drawer and waited about 30 minutes and then applied the second coat.


It was several hours before I got back to the table, but not necessary to wait that long.

After the paint was good and dry, I decided to try sanding the handle as well as several edges to give it a distressed look.


I applied the soft wax followed by the dark wax with my new Annie Sloan Medium size brush.  I think it makes a big difference in applying the wax!


I store playing cards in the little drawer and sometimes when one or more of my sisters are in town, we play a lot of cards.   It was one of my Mom’s favorite pastimes and I often think of her when going to this table to grab the cards.  I think she would have loved the table!


Anyone else taking a break from the garage?  What are you up to instead?

Have a great day!! 

Thursday, February 28, 2013

Laundry Room Reveal


Wow!  Where did February go?  Did you get your laundry room makeover complete?  I put the finishing touches on mine late last night just before my daughter, Katie, came over to take the after pics! 

Which reminds me that I want to thank my hubby, Calvin, daughters, Kelly and Katie, son-in-law, Brad and sisters, Denise and Pege, for all of their help and support.  You will definitely be able to tell it was a joint effort!
Several months ago, I was in one of my favorite shops and found a light fixture I could not leave the store without!  As soon as I saw it, I knew I wanted it for my laundry room, and that began my inspiration. (I forgot to take a picture of it before it was installed, so you'll have to wait and see it in the after shots...sorry!)
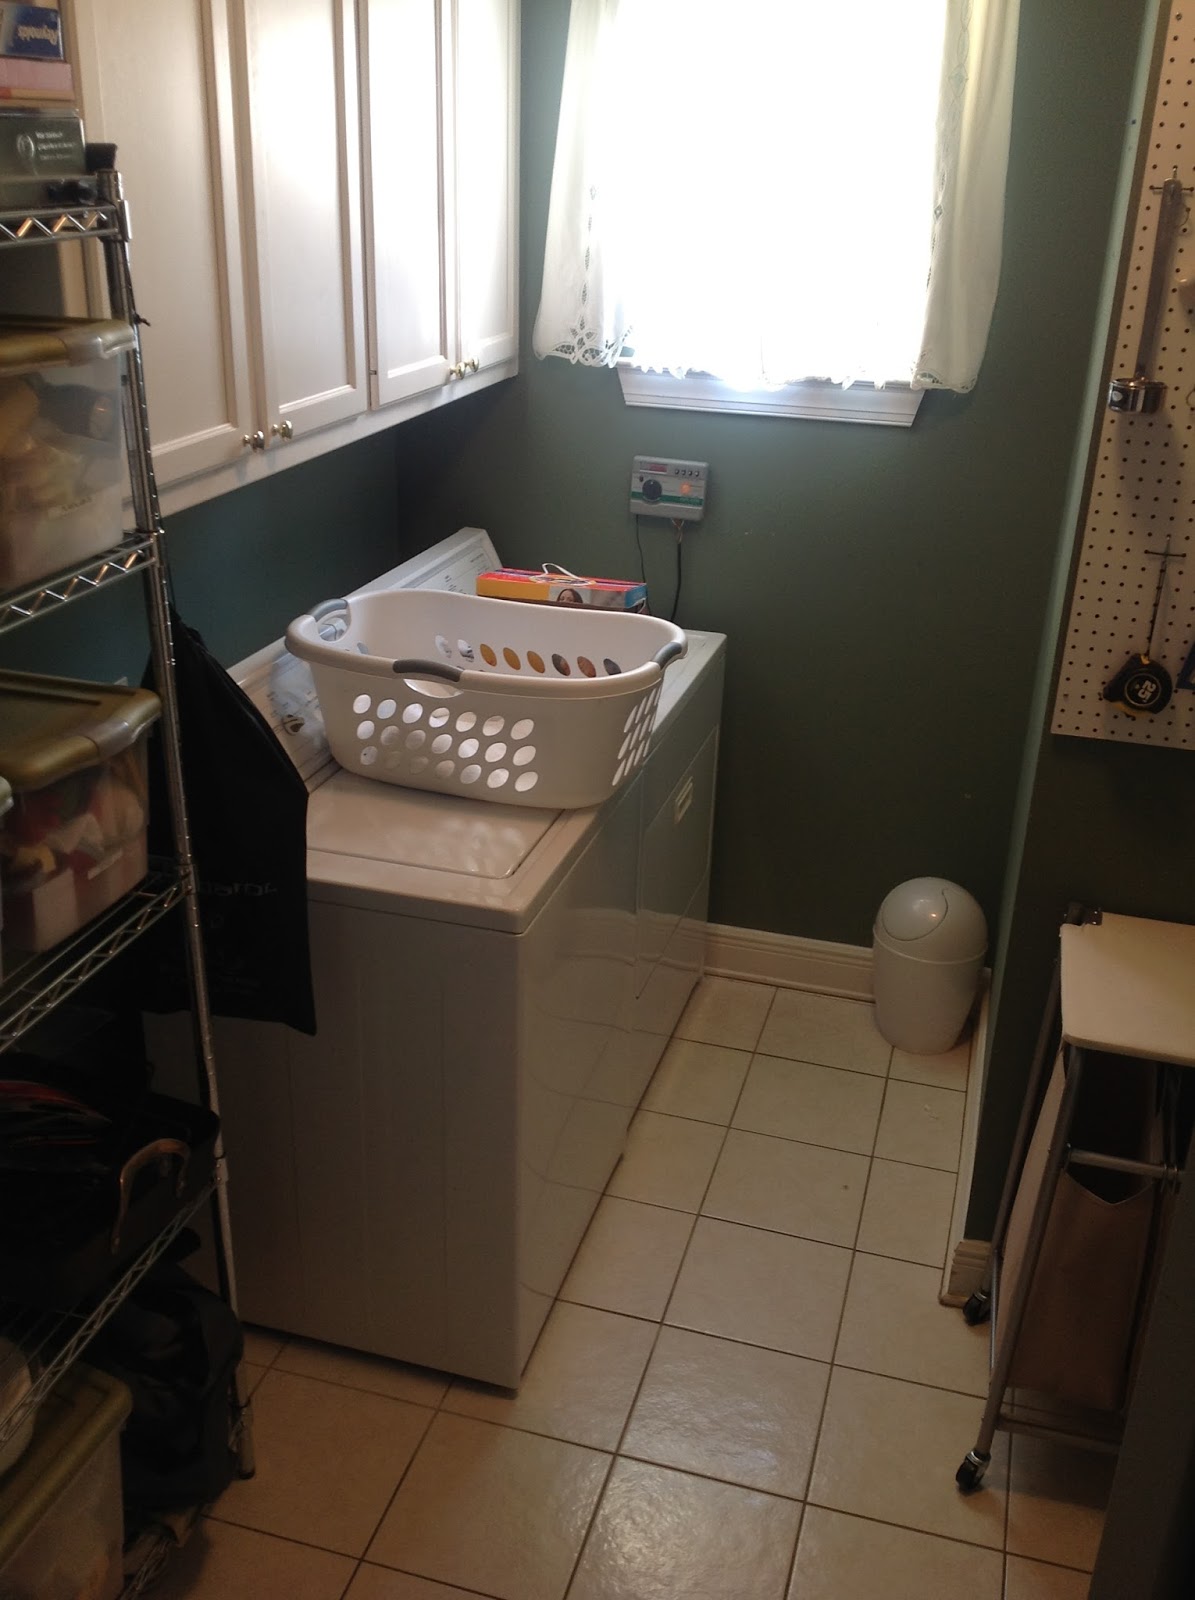
The laundry room had not been painted since before we bought the house so it was definitely in need of a fresh coat!


After seeing a color that I liked on Pinterest, I thought I knew exactly what color I wanted, but when I saw it in person, realized it wouldn’t go with the rest of the house.  So, I ended up with Sherwin Williams Silvermist and I love it!


I had no plans of painting the cabinets, but my daughter said, and I quote, “Mom, you have to paint the cabinets!”  Annie Sloan to the rescue!  I could not believe how easy it was!  No sanding, scraping, soar muscles…you get the picture!


 (And there's that light fixture I could not live without....isn't it great?!!?!)

I found these switch plates when I was looking for new knobs.  I love when I can make a small inexpensive change and it makes a big impact!

When we first moved in to our home years ago, I purchased two of these metal shelving units, which I had somewhat of a system for but wasn’t really utilizing the space to its full potential.  So, they have found a new home, which is a hint to what next month’s challenge will be!


Additionally, I had a pegboard in the laundry room that I intended to use to keep some items more accessible, but it just was not being utilized in the best way.
Some of the items that were on my pegboard are now being stored in one of the cubes in my new Closemaids Cubical Storing Unit I got to replace one of the shelving units.  The pegboard has also found a new home not far from the shelving units. It was so much fun filling up the cubicles!


An unused old picture frame was used for my Martha Stewart Stain Removal basics that I mentioned in an earlier post here.


I made the labels for the baskets to match the one I made for my laundry detergent which I posted here yesterday!


The frame hanging over the unit was actually a Goodwill find! I changed out the pink and white polka dot fabric it came with and replaced it with some leftover burlap from my WASH project.


The hubby and I had fun installing the shelf over the washer and dryer. I was actually able to use a piece of leftover wood I found in the garage for the project. I couldn’t believe it was the exact size I needed, it just needed some color!  And, it gave me the perfect spot for my DIY WASH letters (see post here) I made for the room.


Before the challenge, I was using two separate units for housing the laundry.  I liked the idea of having the unit with three bags for dividing laundry and I liked having a unit to hang clothes on, but I hated how much room they took up.  Needless to say, I was ecstatic when I found this one that combines the two into one.


Finally, this rug pulls all of my colors together and was a bargain compared to other rugs that I looked at online.

And, I know everyone loves before and afters, so just to recap…


In the end, it’s still a laundry room, but I can honestly say that it is a happier place! Stay tuned because tomorrow we will post some reader makeovers!!!


I have listed below where some of the items came from and colors if interested:
1.  Wall paint color – Sherwin Williams Silvermist SW7621
2.  Cabinets paint color – Annie Sloan Crème and Clear and Dark soft wax
3.  Knobs for cabinets  and switch plates – Hobby Lobby
4.  Shelf paint color – Sherwin Williams Plantation Brown SW7520
5.  Shelving unit  and cubicles – Closetmaid 9 cubical storing unit – Wal-Mart
6.  Rug – Better Homes and Gardens – Wal-Mart
7.  3 Bag Laundry Center – Better Homes and Gardens - Wal-Mart
8.  Switch plates – Hobby Lobby