Showing posts with label Kitchen. Show all posts

Friday, May 3, 2013

Kitchen Makeover Challenge Reveal

Okay friends!  It's here - Reveal Day!

How busy was your April?  Mine was crazy busy tackling some areas from scratch and others that just needed some tweeking.  So, let's get started!

Kitchen

kitchen


Kitchen


kitchen


Several years ago I transferred all of my spices into these small jars that I found at Bed Bath & Beyond.  I write the expiration dates on a round sticker and place on the bottom of the jars to ensure freshness.


In a previous post here you may remember I added Fridge Coasters to my refrigerator which I am totally in love with.


kitchen

I spilled red hummingbird food the other day and really put the coaster to the test.  It passed with flying colors!  No clean up and no sign of a spill!
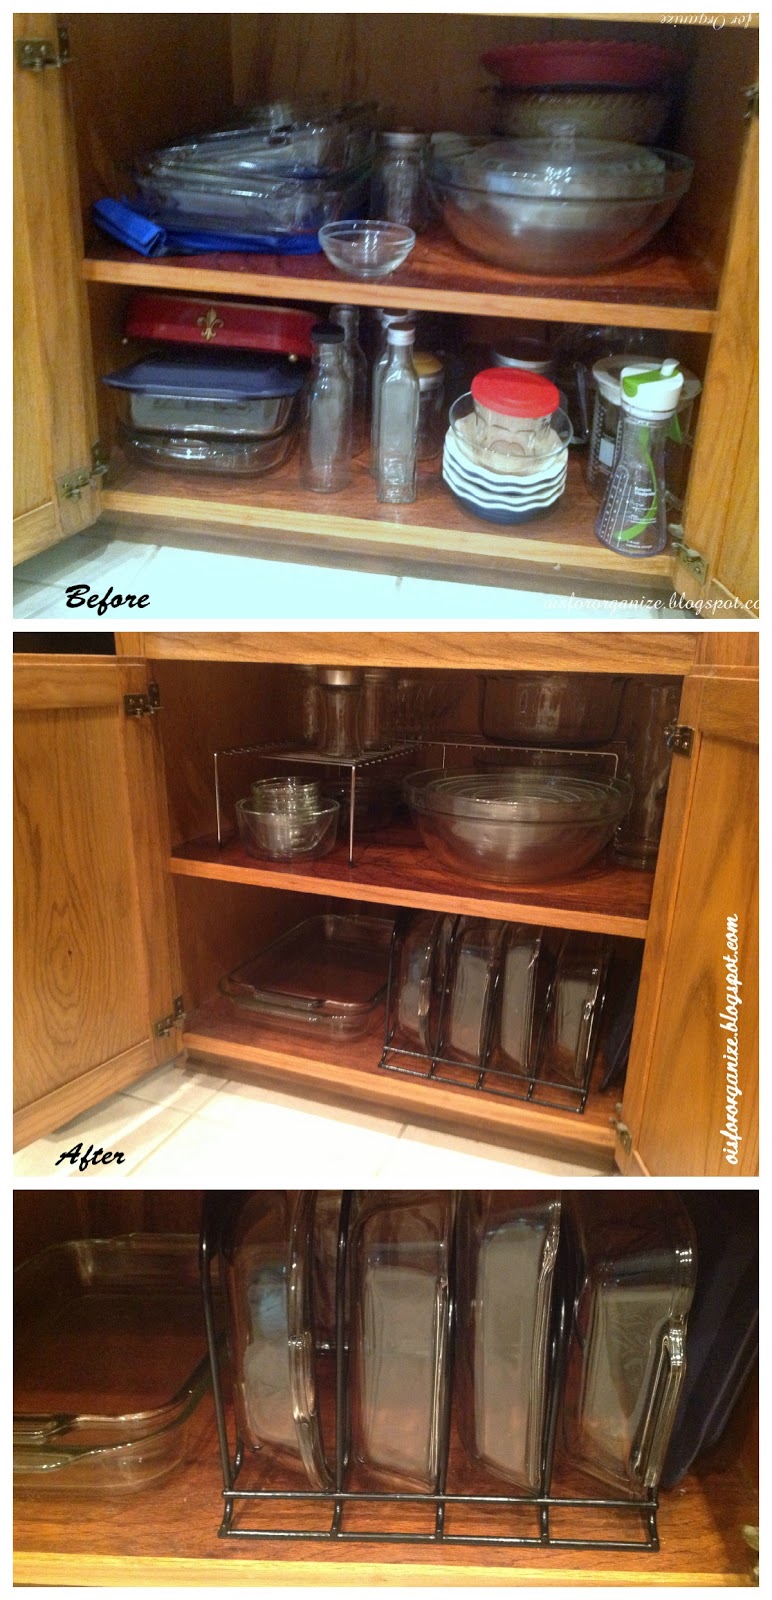

kitchen

This cabinet used to make me crazy.  I removed several items that I don't use very often and then added  a couple of cabinet shelf organizers for easier access to heavy glassware.


After our kids all moved out, I noticed that the pantry door wasn't swinging open and shut quiet as often, so I decided that since it was just the hubby and me using it, I could make it nice and pretty with baskets and chalkboard labels.

kitchen


I liked the look, but I noticed that I was getting a huge overflow on the bottom and stuff in the baskets was lost and forgotten!! Surely I didn't need to stop buying....

So, I removed most of the baskets and added some Clear Better Homes & Gardens containers from Wal-Mart.  Between the clear containers and my new labels, it should be easier to see what I've got!

kitchen


I also added some bamboo lazy susans to make bottle and canned items more visible as well.  I was surprised that the bamboo ones were the same price as the plastic ones.  They were also purchased at Wal-Mart.

kitchen


The pantry door is probably my most favorite part of the entire kitchen makeover!  Silly, I know...sometimes it's just the little things!

kitchen
Here's the Before & After


pantry
Ahhhh....
I will be doing a post on my pantry soon and fill you in on all the little details that brought it together!


kitchen

So, that kind of sums up my kitchen makeover.  Now it's time to hear all about yours!  Please email me your pics  (before and afters) or just afters if you like.  I want to share your amazing work too!

Oh, I almost forgot,

May's Challenge:

HOME OFFICE SPACE

More to come on that too!

Have a great weekend,

Kim


Wednesday, May 1, 2013

Baking Soda & Water, right?

When I tackle a room, I usually try to do the more difficult item first.  Based on some time management research that I have studied, if you tackle the least desirable item on your list first, you are more likely to complete your "to do" list than if you wait leave it for last.

Yeah, well, I kinda threw that thought out the window for this month's challenge in the kitchen....I saved the worst for last - the dreaded oven!

Self cleaning... why yes, I'm blessed with a self-cleaning oven....

but, here's what it looks like when it's completed a 3 hour cleaning cycle...


Not my idea of CLEAN!

Pinterest to the rescue, maybe?

As I searched Pinterest, this pin seemed to be repinned more than others and figured it must be a good one.

I got so excited, I jumped resistantly got off the sofa and went right to work...

without reading the directions all the way through.

See, the directions I read said, "a little (okay, maybe a lot) of baking soda and water".


oven cleaner

But what I missed was the part about this being just for the glass on the oven door.

So...

I scrubbed....

      and I wiped....

              and I scrubbed....

                       and I wiped....

And then of course, here's what happens when the baking soda & water mix drips in between the door.


oven cleaner

I"m not even going to tell you what else was in there!

Several hours later and one really sore back and elbow and I'm done!  


oven cleaner


It looks great, right?  Well, okay...better, much better!


oven cleaner
                      Before                                             After

Afterall, I can close the door and look at this pretty dish towel!


oven cleaner


If you are thinking about cleaning your oven anytime soon, let me know how it goes.

Oh, and you might want to read ALL the directions.


Stay tuned tomorrow for the entire Kitchen Reveal!


Monday, April 22, 2013

Too Busy for a Lizard


Let me first preface this post by saying that it would be an understatement to say I have a terrible phobia of lizards…..I hate them so much I’m considering therapy!

When I last posted, I certainly didn’t plan to be gone for a week...but so glad to be back!

I guess sometimes our lives get busier than we can anticipate, no matter how organized we are.

I knew that last week would be busy; for starters, I would be putting the finishing touches on my refrigerator makeover.  I also knew that I would be changing our cable, internet and phone service. Additionally, I knew that I would be going to New Orleans for a quick day visit with Kelly and to bring her some containers that came in for her refrigerator makeover.

What I didn’t know was that I was going to lose a FULL day of internet service.  I also didn’t know that the containers I was bringing to Kelly weren’t going to arrive at my house until 7 pm that evening. And, I definitely didn’t know that when I got to Kelly’s we were going to Annie Sloan 3 pieces of furniture, yes I said “3”, rearrange the master bedroom, and go on a shopping excursion.    I should say that Kelly didn’t know that either…it just kind of happened, which, by the way, I’m not complaining about!!  Thank goodness I packed an overnight bag just in case!

Side note:  We were in such a hurry to go shopping for new items for her bedroom that when I changed my clothes, I put my shirt on inside out, only to have a lady in line at the store inform me of such!

refrigerator makeover
Here I am trying to hide that fact that had just been pointed out to me!!

Unfortunately, I managed to leave her house without taking A SINGLE after picture of the three pieces of furniture or the bedroom.  When I get the pictures from her, I will be sure to share.  Everything came out really nice and I’m anxious to show it all off!

Likewise, I’m just as anxious to share my newly organized refrigerator!

Here is my refrigerator before I got started.


refrigerator makeover


And here it is after.

refrigerator makeover

After reading A LOT of blogs about Fridge Coasters, I knew I had to have them.  They are super absorbent “liners” and are easily installed into the fridge. They come in 3 different sizes and patterns and help keep the shelves clean!

refrigerator makeover


refrigerator makeover
 I love how they provide a consistent look in the fridge!


After doing an inventory of my staple items, I decided which ones I wanted in food storage containers and then determined where I would place them in the fridge. 

refrigerator makeover
Love these for our yogurt and cheeses.


refrigerator makeover
Look at this little guy!  Don’t you hate an opened stick of butter and no where to put it!


refrigerator makeover
Love this one for bacon!


refrigerator makeover
Fruits and vegetables BEFORE


and AFTER
refrigerator makeover


refrigerator makeover

refrigerator makeover


If you are interested in purchasing Fridge Coasters you can go to their website here.

All of my containers were purchased from The Container Store and some are currently on sale at the time of this posting.

How is your Kitchen Makeover Challenge progressing?   Have you found any great items to help organize your kitchen that you would like to share with us?  Please post your comments!

Oh yeah, about the lizard….when we were getting ready to go shopping I heard a loud scream from the other room, which was followed with “Mom, there’s a lizard in the house!”  OMG!!!  I guess when we rearranged the master bedroom, we must have disturbed our little house guest!  Thank goodness for her next door neighbors’ son who was more than happy to catch the sucker and remove him!  Yuck!  I’m getting goosies just writing about it!

Happy Organizing!

Kim  

Thursday, October 18, 2012

Under the Kitchen Sink!

As I promised yesterday, I want to share my latest organization project! I hope I inspire and challenge others who are in need of a makeover under the kitchen sink to roll up their sleeves and enjoy the results!

Here's how I did it:

1. First, I removed everything from the cabinet and purged items that I didn't need. I also moved housecleaning products to a different cabinet which I will share in a later post.


Under Kitchen Sink

Under Kitchen Sink

Under Kitchen Sink


2. Then I cleaned the cabinet with soapy water and wiped it dry.


Under Kitchen Sink

3. I laid down contact paper which I had purchased from Target for around $6 per roll. I used less than one roll for my cabinet.


Under Kitchen Sink


4. Once I had my paper laid down, I categorized like items together and used these organizing bins, which have a great stacking feature, for storing. The bins were also purchased at Target.


Under Kitchen Sink


Under Kitchen Sink


5. Lastly, I decided to place tags to identify where my items were located in each bin.
Under Kitchen Sink

Under Kitchen Sink

Mission accomplished! Now it's your turn! Please send pictures of your before & after to oisfororganize@gmail.com and I will share on my blog!