It’s Carnival Time!!!
Growing up in New Orleans , Louisiana
Since I no longer live in “the Big Easy”, I don’t experience Mardi Gras quite like I used to. However, I do enjoy keeping a part of it in my home by decorating my dining room during the Mardi Gras season and this year was no exception.
I really like to focus on my table for Mardi Gras and on Mardi Gras Day (which is Tuesday, February 12th this year), I will prepare a New Orleans New Orleans
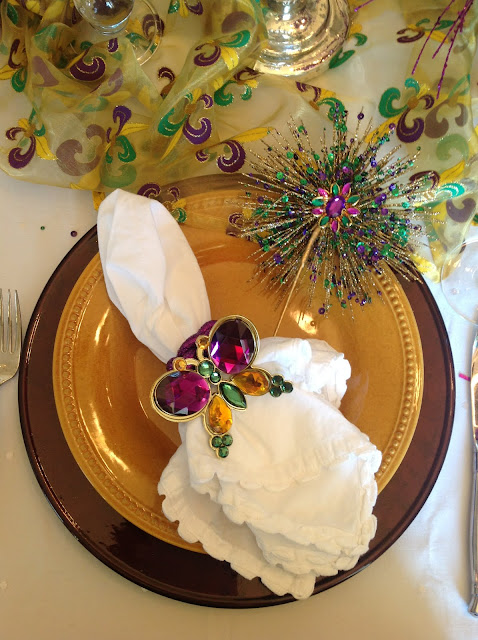
The butterflies were a recent addition to the table. They have a clip on the back that I used to attach them to the napkins.

The crown is placed inside of a green wreath that I had leftover from Christmas and then wrapped in Mardi Gras garland that I purchased from the grocery store.
I recently discovered a website, Dear Lillie, and was inspired by the cones that she made for Christmas, as well as her daughter’s bedroom. It really was as simple as she said!
On a quick trip to Hobby Lobby, I purchase three different size cones and some purple, yellow and green yarn. I wanted different textures of yarn and they had so many to choose from.
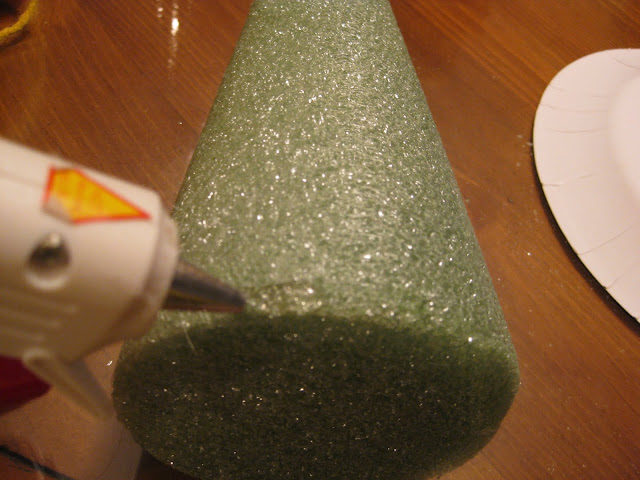
The only other items I needed were a pair of scissors, and a hot glue gun, or I could have just used regular glue.
I put a small amount of hot glue at the bottom of the cone and then place the yarn directly on top of the glue.
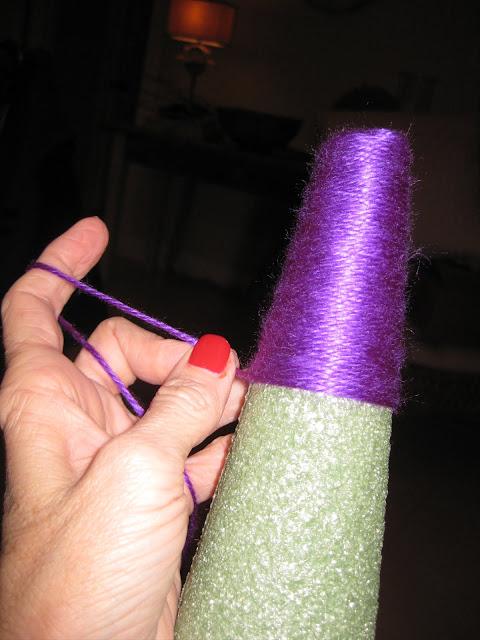
Then I started winding the yarn around the cone, from the bottom up, using my finger to guide it very close to the previous layer of yarn. I did find I had a little bit of difficulty keeping the yarn on the bottom of the cone, so for the purple one, I decided to start from the top and work my way down.
I did find it easier to start, but then I had to cut a new piece for the very top of the cone, which was not a big deal but when I started from the bottom up, I didn’t have to do that extra step.
The green and yellow went fairly quickly but the purple one took about two hours because the thread was fine and I wanted it on the biggest cone.
I found the perfect spot for them in my dining room and added the Mardi Gras boa and placed each cone on different stands I had around the house.

This was a fun and relaxing project. I had plenty of yarn leftover and plan to make more for some family members. Hmmm….I wonder who they might be!
Happy Organizing & Mardi Gras!!


2 comments:
I know I could sure use some!!!!!
Imagine that, Kelly!
Post a Comment